this post was submitted on 20 May 2024
88 points (92.3% liked)
3DPrinting
15276 readers
83 users here now
3DPrinting is a place where makers of all skill levels and walks of life can learn about and discuss 3D printing and development of 3D printed parts and devices.
The r/functionalprint community is now located at:
!functionalprint@kbin.social
or !functionalprint@fedia.io
There are CAD communities available at:
!cad@lemmy.world or !freecad@lemmy.ml
Rules
-
No bigotry - including racism, sexism, ableism, homophobia, transphobia, or xenophobia. Code of Conduct.
-
Be respectful, especially when disagreeing. Everyone should feel welcome here.
-
No porn (NSFW prints are acceptable but must be marked NSFW)
-
No Ads / Spamming / Guerrilla Marketing
-
Do not create links to reddit
-
If you see an issue please flag it
-
No guns
-
No injury gore posts
If you need an easy way to host pictures, https://catbox.moe may be an option. Be ethical about what you post and donate if you are able or use this a lot. It is just an individual hosting content, not a company. The image embedding syntax for Lemmy is 
Moderation policy: Light, mostly invisible
founded 1 year ago
MODERATORS


I have ACM on mine, definitely recommend, did need to print thicker panel mounts for them though. Those definitely sound like some decent chamber temps, I've had decent enough results in the 40s, I'd be interested to see where ACM + bubble insulation goes.
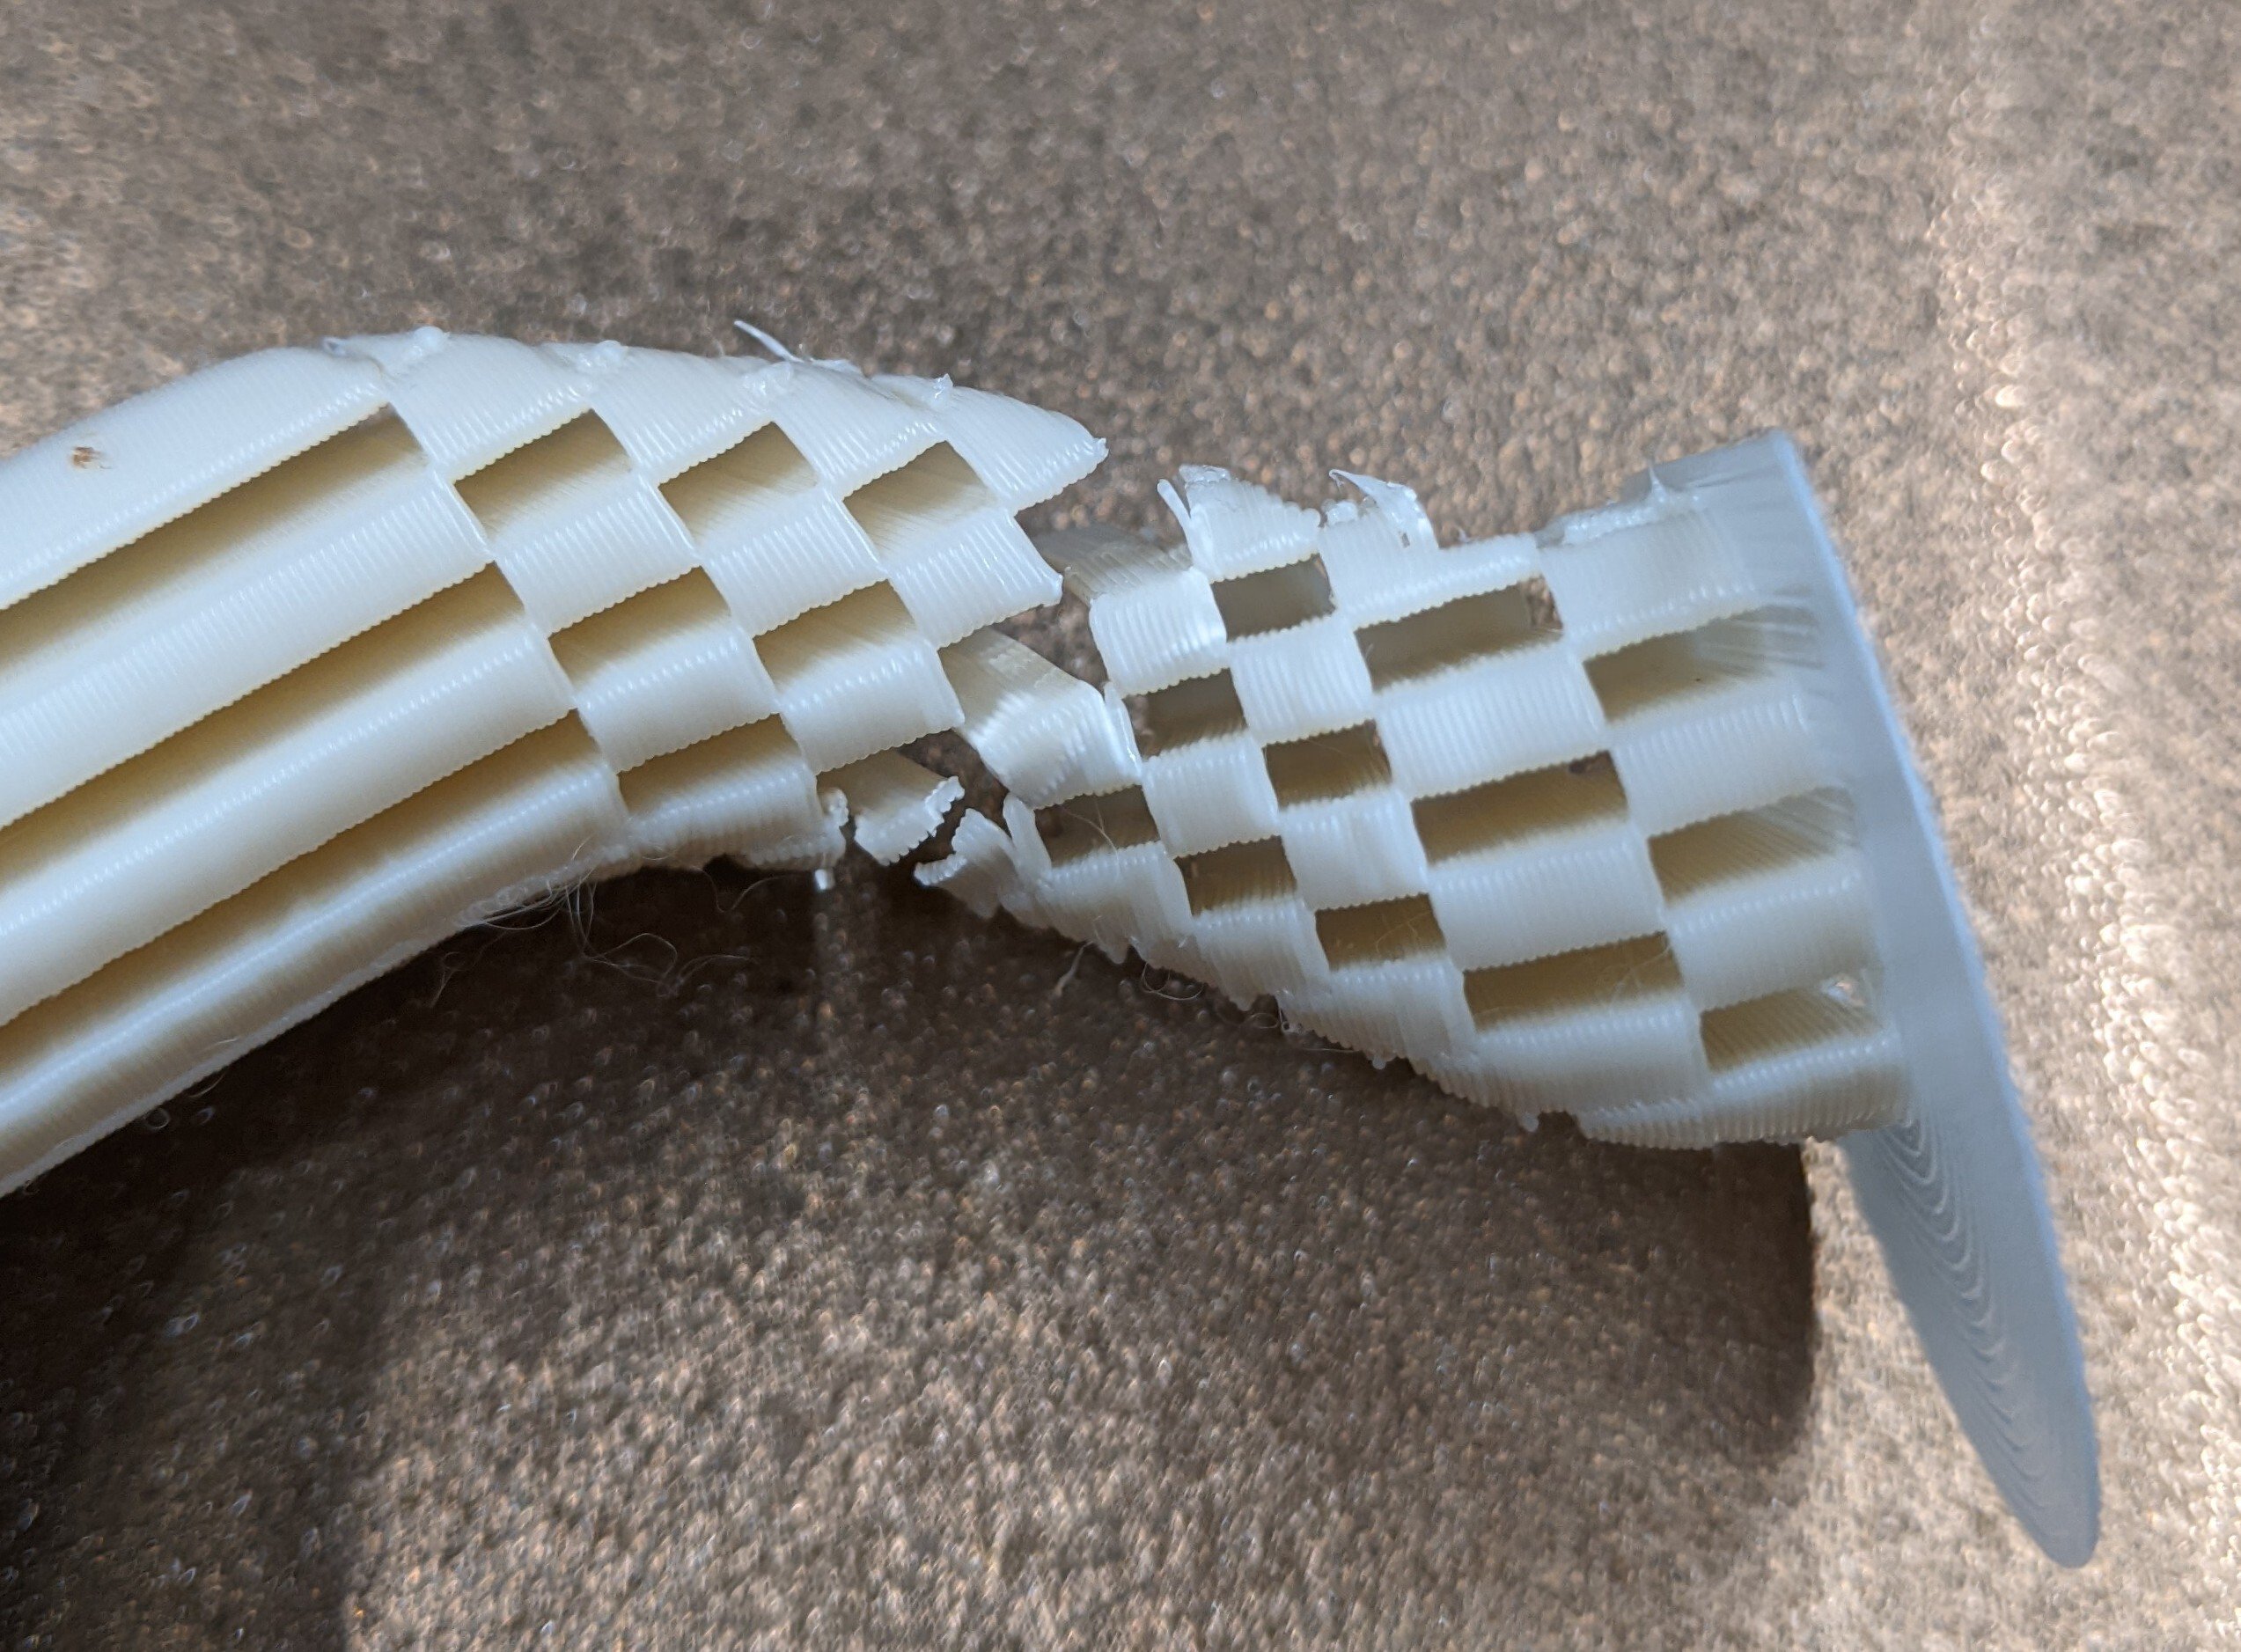
I've had a number of bigger prints warp with just acrylic panels :( now that I've finally figured out how to consistently nail my first layer the last print lifted the build plate. I was impressed, lol.
I need to figure out what I'm going to do for my door. Thinking about going clicky-clack so I can still eyeball the first layer out of habit.
I have 2 doors with the 270 deg hinges with latches, but I'm honestly super interested in something like the clicky-clack for sealing, theres a slight gap between mine and I've not got around to making something to fill it without getting in the way. I have little tiny windows on mine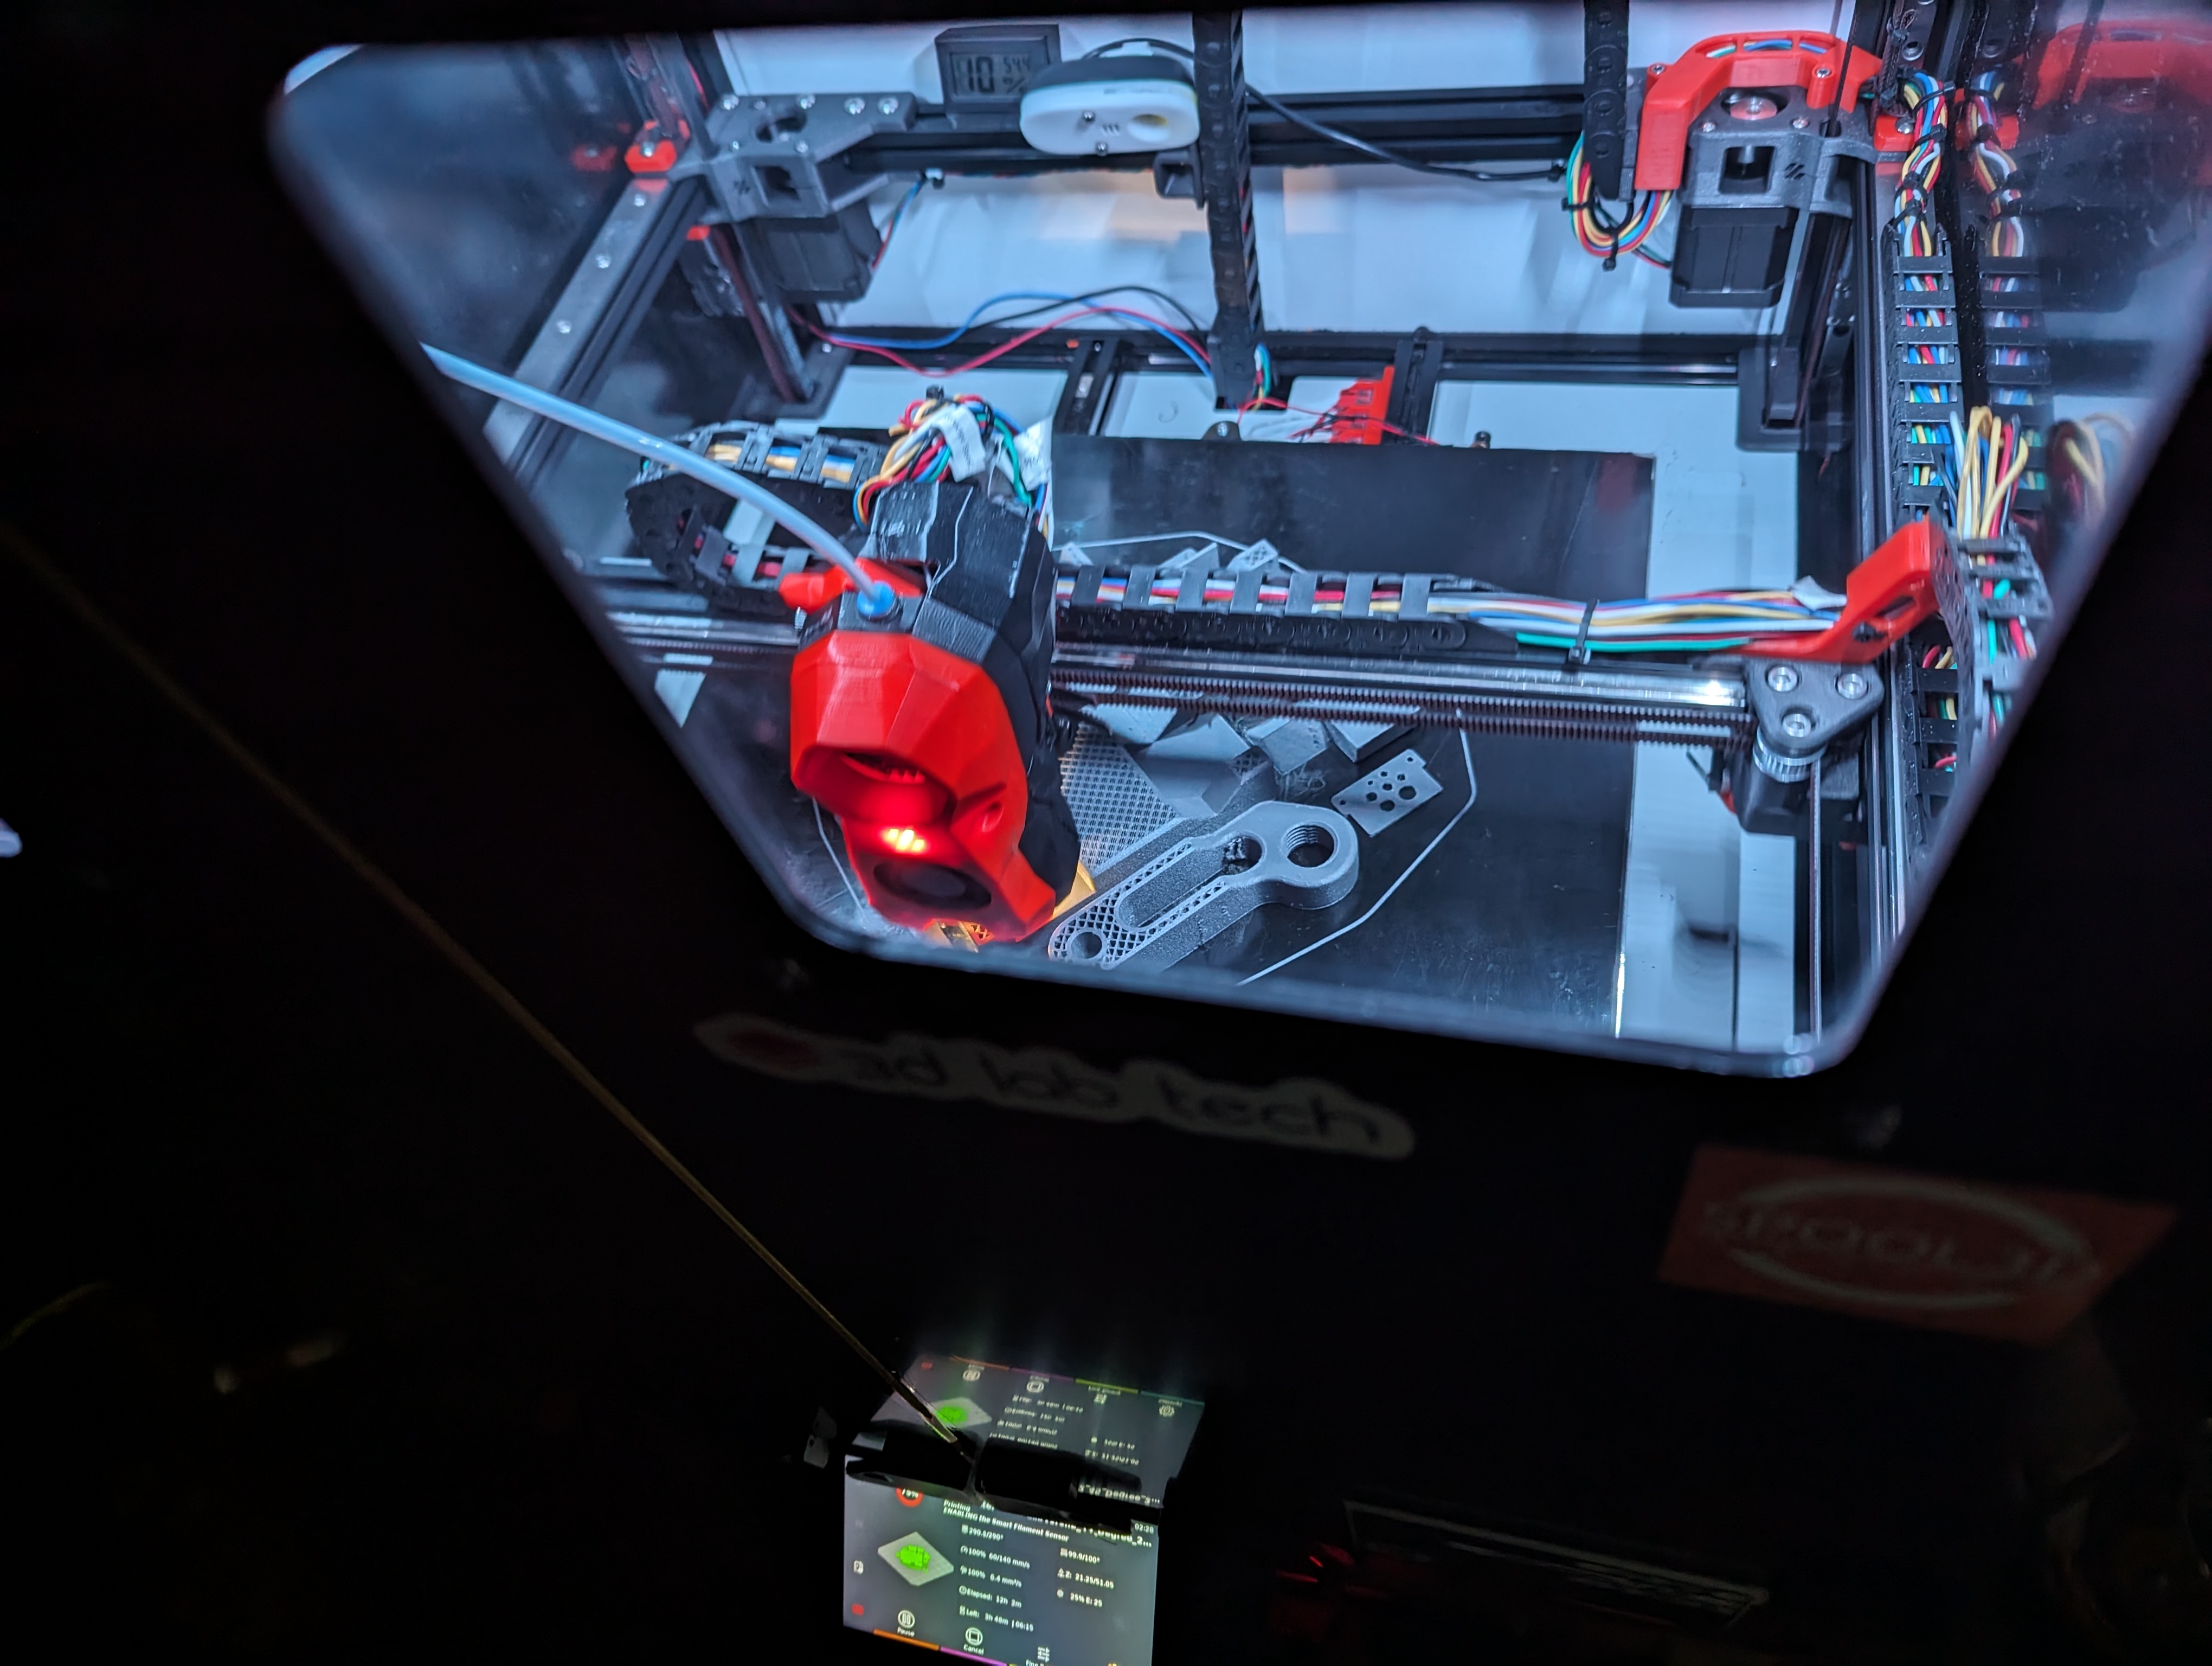 (excuse the loose cable, hadn't printed slot covers for the lights yet, just put the covers on today) you can kinda sorta see what's going on but Yeah, definitely relying on known good profiles and stores offsets for each of my surfaces. Tap kinda sorta makes swapping nozzles less of an issue but I still like having different offsets, textured is a bit closer and nylon is just a bit further away.
Super impressive it stayed adhered honestly, I had that happen with buildtak but not with a standard pei surface.
No adhesion helpers either, I was pretty pleased! This macro seems a bit daunting to set up and get running, but it should solve most of your challenges: https://github.com/protoloft/klipper_z_calibration
I'll look at it for sure thanks! I think I was going to try it a while back but never got around to it as I figured the tap probe would handle it, found it most important to keep the nozzle clean (shocking I know considering it's my z probe!), I had a cleaning macro before I installed the kinematic bed, might set that up again when I get around to it, need to make some height adjustments to the models as the bed itself sits higher than stock.